As promised, I am going to talk about how you count your stitches. This is helpful for when you lose your place, which will happen often. You’ll need to know how to count your stitches to get back to where you were in the pattern. Ideally you would mark off the rows on your pattern to let yourself know you finished them, but if you are anything like me, you’ll get really focused on your knitting and forget. Or you’ll get involved in a TV show part way through a row, or the ever dreaded person talking to you. haha! I will use the dishcloth pattern as the example of how to count your stitches. Moving from knits to purls can be more difficult when you start out, because you will need to know what loops to count, and which to not.
First up, is counting knit rows. Each knit stitch will make a V shape that makes it easier to count. However, when you have finished a purl row and have moved on to knitting, it’s not as simple as counting the V’s. This is where we need to dive into the anatomy of a stitch. As you may have noticed, whenever you knit or purl a stitch, you end up with the old stitch under your right needle, and a loop on your right needle. Every time you have the same type of loop on your right needle, regardless of what the stitch is under it. So, when you purl a stitch you are going to have the knit stitch buried a bit, and might have to stretch your work to count the knit stitches.
Here is row number 1:

Row 2 (you can see how the knit from row 1 buried itself again):

Row 3:

Row 4:

When you are switching from knit stitches to purl stitches, you will have what looks like a 5th knit stitch directly under your purls. This is actually part of the purl stitch and is not counted as a row. This was the stitch that was on your needle that you purled into to get a new loop on your right needle. You will see that the top half of it is actually covered by a purl bump, and looks like this when you stretch it out:

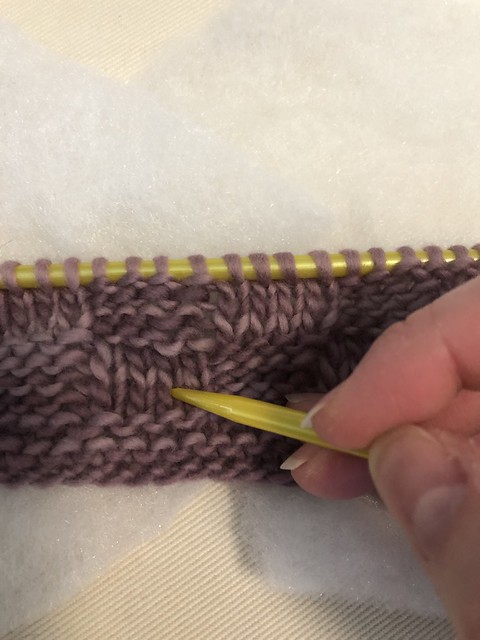
Next is how to count purl rows. Purls will create zig zag of bumps on your knitting. I pick one line of bumps and count those to keep things straight.
Row 1:

Row 2:

Row 3:

Row 4:

Now that we have the rows, we need to know how to count stitches. This is very much the same thing, except now instead of work our way up to the needles to count, we count from right to left. 😀
Purl Stitch 1:

Purl Stitch 2:
Purl Stitch 3:

Purl Stitch 4:

Knit stitches will be counted in the same manner.
Knit Stitch 1:

Knit Stitch 2:
Knit Stitch 3:

Knit Stitch 4:

That is how to count all of your stitches within the dishcloth. A big part of being able to count your stitches in your work is being able to recognize the different stitches. As we progress through different stitches, like how to increase or decrease the number of stitches to make designs in your knitting, I will also make sure to do a post on how to recognize those stitches. Being able to tell what the stitch is will be incredibly helpful as you increase the difficulty in your knitting. You want to be able to look at your work and be able to quickly figure out where you left off.
Now, while this is the way that I count, you may find that others will count differently than this. As I showed you how to count the purl rows, I actually did it differently than I normally do, but visually this was the best way to see what was happening. As we increase difficulty I will get into more stitch anatomy and you will be able to decide for yourself exactly how you want to count your stitches. But, this way is just really good visually for you to be able to see each knit stitch, for example, in its full open V glory. 😀
I hope this has helped you to be able to continue learning your craft and to know where you are in your work!!